Create Disk Templates
Palette Virtual Machine Orchestrator (VMO) enables you to quickly deploy Virtual Machines (VMs) by creating VM templates.
When deployed from a template, VMs include a disk template containing a pre-installed copy of the desired Operating System (OS). The Kubevirt Containerized Data Importer (CDI) imports templates through Data Volumes. This guide demonstrates how to implement your own disk and VM templates using Kubevirt Data Volumes.
Prerequisites
- A VMO profile. Check out the Create a VMO Profile guide to learn how you can create this profile.
- A cluster deployed with this VMO profile. Check out the Deploy a Cluster tutorial for detailed steps on how you can deploy clusters to a public cloud.
Create a Template
-
Create a new Add-on Profile with the following manifest. Check out the Add a Manifest guide for more information.
The provided manifest defines a
DataVolumethat imports the example disk template for Ubuntu 22.04 into thevmo-golden-imagesnamespace. This snippet has three important configuration options.-
cdi.kubevirt.io/storage.deleteAfterCompletionthat prevents deleting theDataVolumeobject after the import process completes. This annotation is necessary to stop Palette from continuously recreating theDataVolumeobject. -
volumeModethat aligns with the mode that CSI supports forReadWriteManyaccess. For some CSIs, such as Rook-Ceph and EMC PowerMax, it's theBlockmode, while for other CSIs, such as Portworx, Longhorn, and EMC PowerFlex, it's theFilesystemmode. Make sure to check thevolumeModesetting if you choose another CSI. -
registrythat specifies a container disk on an external Docker registry from which data should be imported. Check the CDI DataVolumes documentation for other possiblesourcevalues.apiVersion: cdi.kubevirt.io/v1beta1
kind: DataVolume
metadata:
name: "template-ubuntu-2204"
namespace: "vmo-golden-images"
annotations:
cdi.kubevirt.io/storage.deleteAfterCompletion: "false"
spec:
storage:
accessModes:
- ReadWriteMany
resources:
requests:
storage: 50Gi
volumeMode: Block # or "Filesystem", depending on the CSI used
source:
registry:
url: "docker://gcr.io/spectro-images-public/release/vm-dashboard/os/ubuntu-container-disk:22.04"warningWhen the
Filesystemmode is selected, the CDI will automatically apply a small overhead factor to the Persistent Volume Claim (PVC) size to account for the storage space lost due to the filesystem overhead. As a result, the PVC for such a template will be slightly larger. Any clones made from this PVC will also use this larger minimum size.
-
-
Create another manifest in this cluster profile and add the following code snippet.
This snippet has three notable configurations.
-
spec.dataVolumeTemplates.specthat defines which source PVC to clone from and what PVC to clone into. -
spec.dataVolumeTemplates.spec.sourcethat points to thetemplate-ubuntu-2204PVC in thevmo-golden-imagesnamespace. -
spec.dataVolumeTemplates.spec.pvcthat creates a new target PVC with the specifiedaccessModeandvolumeModecharacteristics. The size of the new PVC must be the same or larger as the source PVC.warningTo enable CSI-assisted cloning, you must fulfill a few prerequisites. For instance, the source and target PVCs must share the same Storage Class and Volume Mode. The CDI will automatically fall back to slower host-assisted cloning if you don't meet these requirements.
apiVersion: spectrocloud.com/v1
kind: VmTemplate
metadata:
  name: ubuntu-2204
spec:
  dataVolumeTemplates:
    - metadata:
        name: ubuntu-2204
      spec:
        source:
          pvc:
            name: template-ubuntu-2204
            namespace: vmo-golden-images
        pvc:
          accessModes:
            - ReadWriteMany
          resources:
            requests:
              storage: 50Gi
          volumeMode: Block # or "Filesystem", depending on the CSI used
  template:
    metadata:
      annotations:
        descheduler.alpha.kubernetes.io/evict: "true"
    spec:
      domain:
        cpu:
          cores: 2
          sockets: 1
          threads: 1
        devices:
          disks:
            - disk:
                bus: virtio
              name: datavolume-os
            - disk:
                bus: virtio
              name: cloudinitdisk
          interfaces:
            - masquerade: {}
              name: default
              model: virtio
        machine:
          type: q35
        resources:
          limits:
            memory: 2Gi
          requests:
            memory: 2Gi
      networks:
        - name: default
          pod: {}
      volumes:
        - dataVolume:
            name: ubuntu-2204
          name: datavolume-os
        - cloudInitNoCloud:
            userData: |
              #cloud-config
              ssh_pwauth: True
              chpasswd: { expire: False }
              password: spectro
              disable_root: false
              runcmd:
                - apt-get update
                - apt-get install -y qemu-guest-agent
                - systemctl start qemu-guest-agent
name: cloudinitdisktipTo enable CSI-assisted cloning into larger PVCs than the source PVC, set
allowVolumeExpansion : trueon your defined Storage Class.
-
-
When the CDI clones a PVC, it runs under the
defaultservice account in the namespace of the target PVC. When the source PVC is in a different namespace, you must give the required permissions to the service account. The VMO pack version 4.2.0 (or higher) does this automatically through its default pack specification. This configuration uses thevmEnabledNamespacesoption to specify the namespaces for which the permissions are configured.charts:
virtual-machine-orchestrator:
# This namespace will be used to store golden images
goldenImagesNamespace: "vmo-golden-images"
# These namespaces will be created and set up to deploy VMs into
vmEnabledNamespaces:
- "default"
- "virtual-machines" -
By default, the CDI contains an internal database of CSIs, with the CSI supported access modes, volume modes, and CSI-assisted cloning support. However, we recommend creating a
StorageProfileto adjust these parameters to your desired values.Create another manifest in this cluster profile and add the following code snippet.
This snippet has three notable configurations that define the storage class.
-
The storage class has the name
ceph-block. -
The storage class supports the
Blockvolume mode with theReadWriteManyaccess mode. -
The storage class uses
csi-clonefor cloning operations.apiVersion: cdi.kubevirt.io/v1beta1
kind: StorageProfile
metadata:
name: ceph-block
spec:
claimPropertySets:
- accessModes:
- ReadWriteMany
volumeMode: Block
cloneStrategy: csi-cloneExpand the following section to learn how you can use storage profiles for CSI-assisted cloning.
Storage Profiles in VM Templates
If Storage Profiles are not manually defined, the CDI will automatically generate one for every Storage Class based on the information in its internal database. We recommend verifying that these parameters are accurate for your use case and, if not, overwriting them to define a Storage Profile manually.
Per the CDI documentation, you can optionally replace the target
pvcsections in yourvmTemplateresources with astoragesection once you have defined a storage profile.Using storage instead of PVC will automatically discover default values for
accessMode,volumeModeand, optionally, even the size from the source PVC and its associated storage profile.A benefit of
storageoverpvcis that the CDI will automatically calculate the size overhead forFilesystemmode storage classes, allowing the VM template to use the original disk size instead of the one adjusted for the filesystem overhead.If you want to use this template, replace the contents of the manifest you added in step two with the following snippet.
apiVersion: spectrocloud.com/v1
kind: VmTemplate
metadata:
  name: ubuntu-2204
spec:
  dataVolumeTemplates:
    - metadata:
        name: ubuntu-2204
      spec:
        source:
          pvc:
            name: template-ubuntu-2204
            namespace: vmo-golden-images
        storage:
          resources:
            requests:
              storage: 50Gi
  template:
    metadata:
      annotations:
        descheduler.alpha.kubernetes.io/evict: "true"
    spec:
      domain:
        cpu:
          cores: 2
          sockets: 1
          threads: 1
        devices:
          disks:
            - disk:
                bus: virtio
              name: datavolume-os
            - disk:
                bus: virtio
              name: cloudinitdisk
          interfaces:
            - masquerade: {}
              name: default
              model: virtio
        machine:
          type: q35
        resources:
          limits:
            memory: 2Gi
          requests:
            memory: 2Gi
      networks:
        - name: default
          pod: {}
      volumes:
        - dataVolume:
            name: ubuntu-2204
          name: datavolume-os
        - cloudInitNoCloud:
            userData: |
              #cloud-config
              ssh_pwauth: True
              chpasswd: { expire: False }
              password: spectro
              disable_root: false
              runcmd:
                - apt-get update
                - apt-get install -y qemu-guest-agent
                - systemctl start qemu-guest-agent
          name: cloudinitdisk
-
-
Click on Confirm & Create.
-
Complete the cluster profile configuration and click on Finish Configuration.
Validate
-
Navigate to the left Main Menu and select Clusters.
-
Select your cluster and click the Profile tab.
-
Add the newly created Add-on Profile to your cluster profile. Click on Save.
Your cluster applies the changes. As soon as the cluster finishes updating, the CDI begins to import the data into the target PVC in the
vmo-golden-imagesnamespace. The target PVC has the same name as theDataVolumeobject.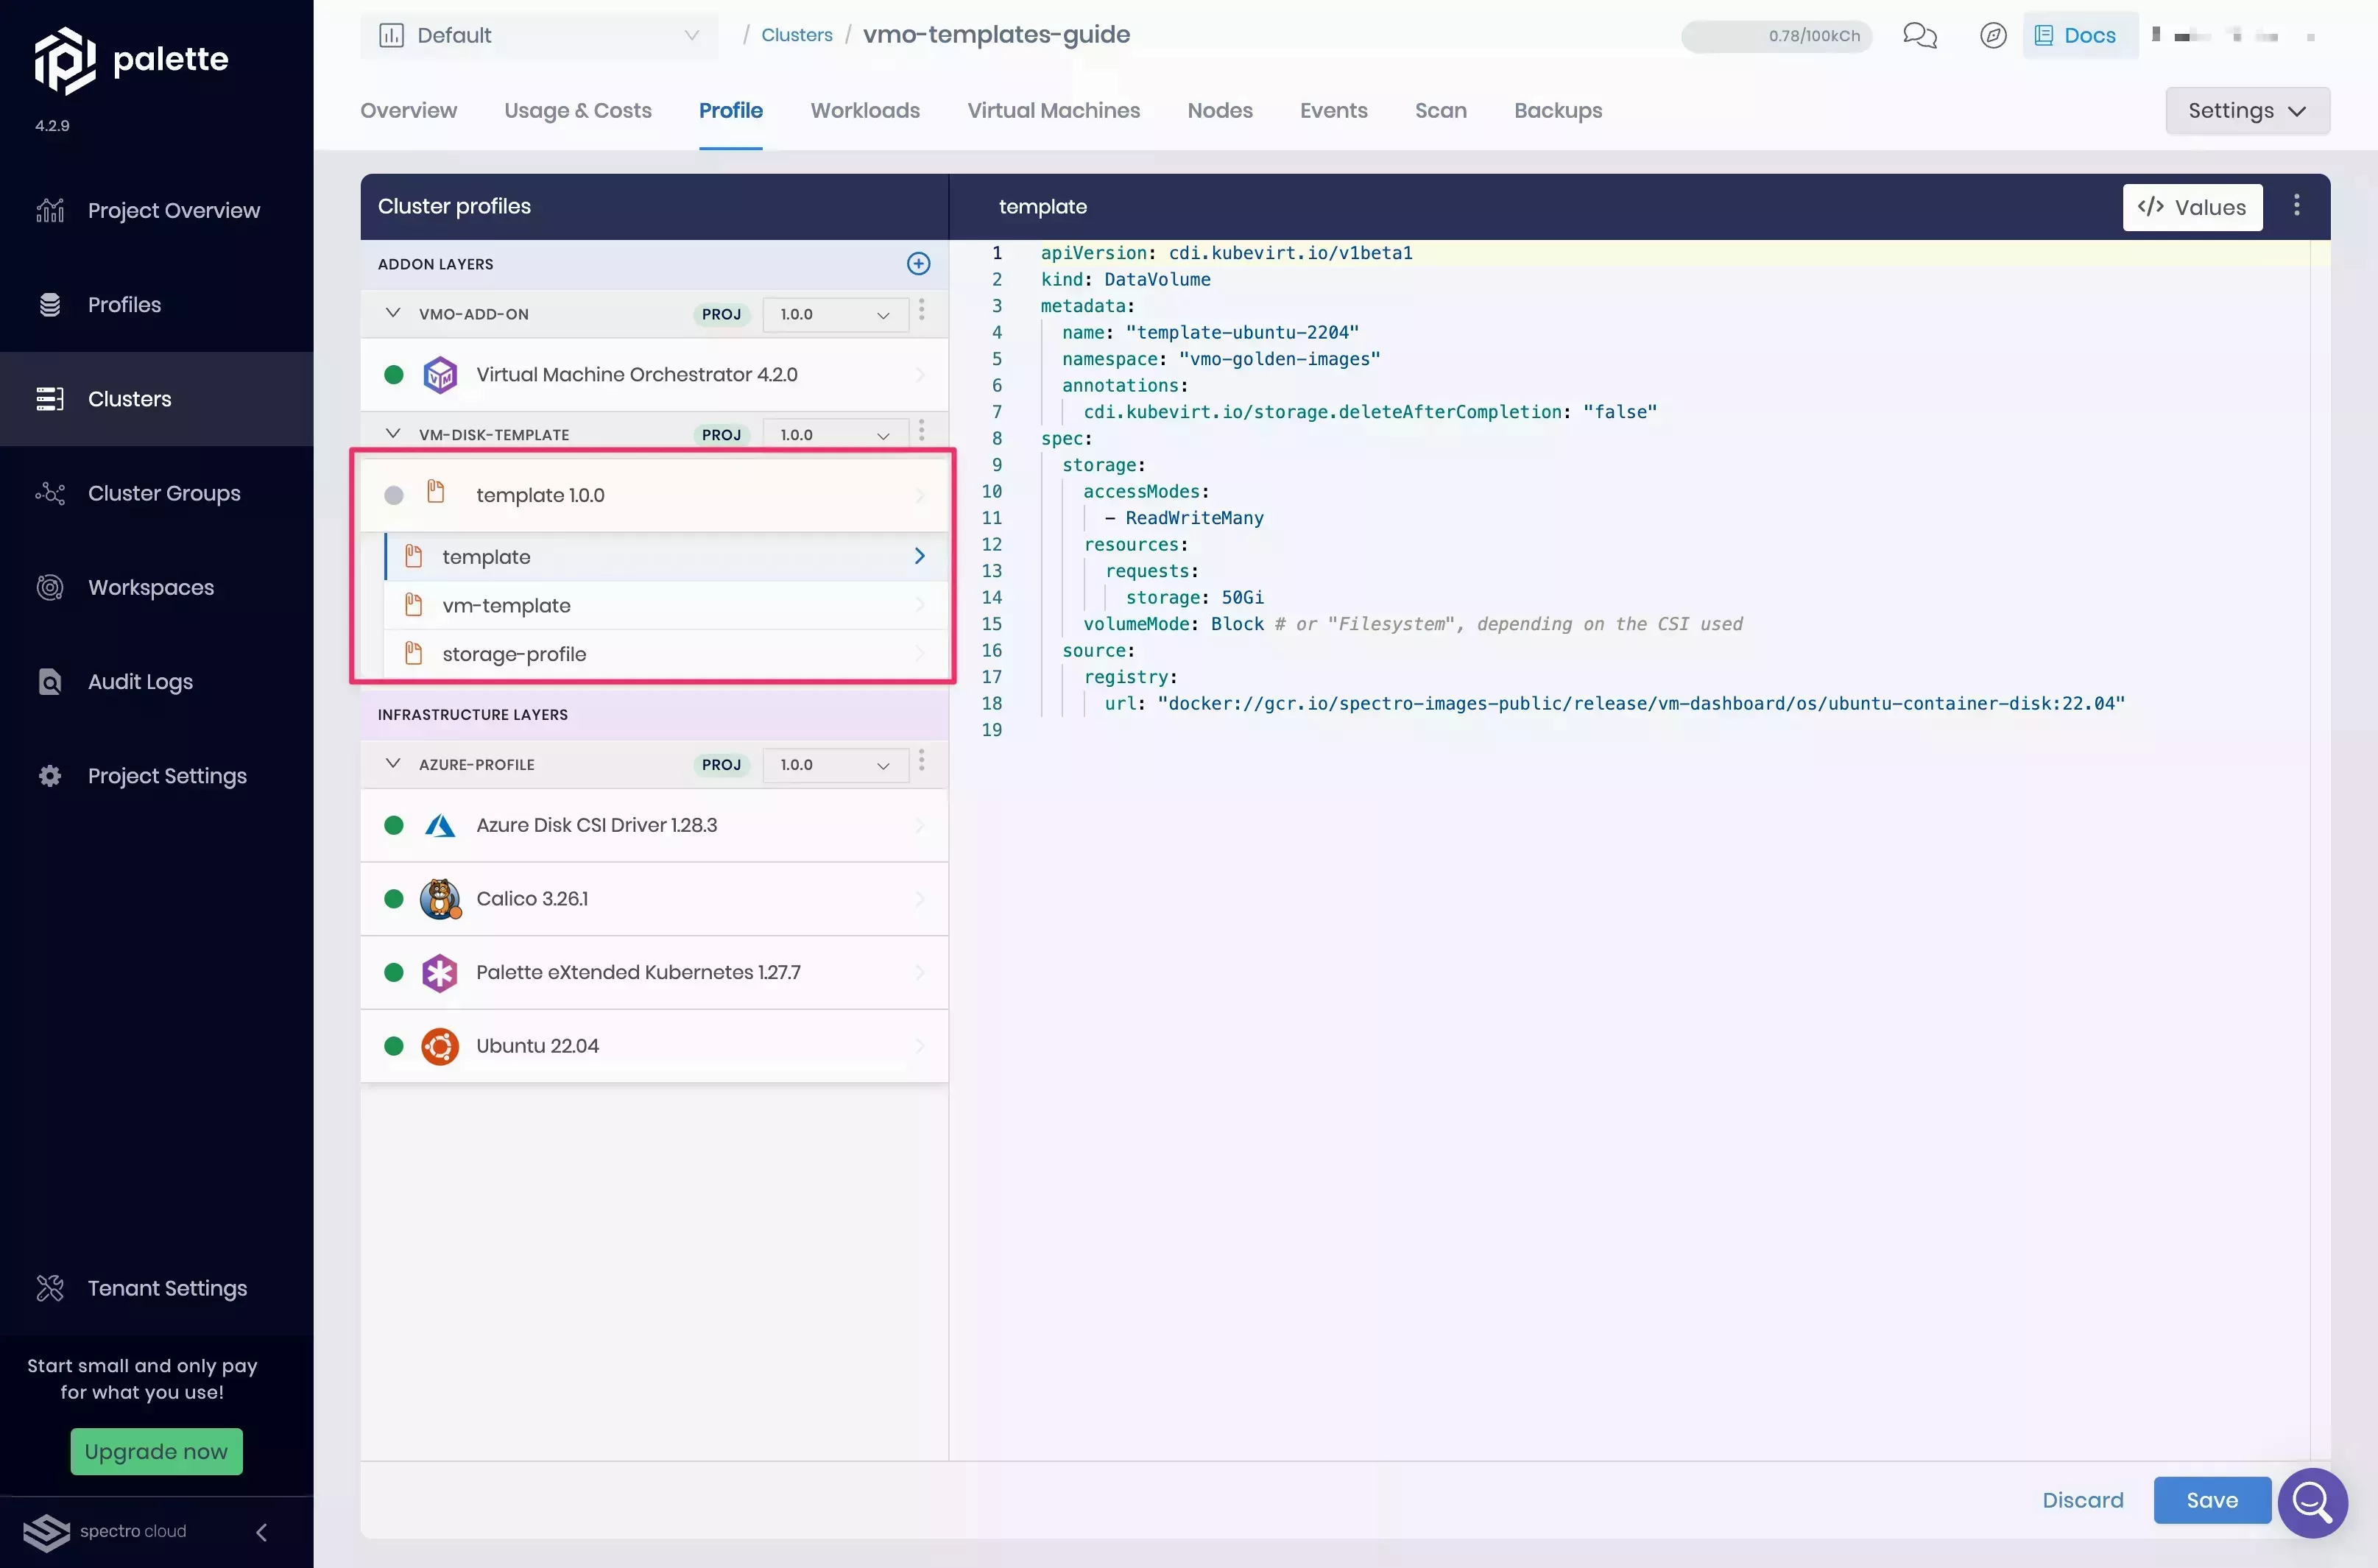
-
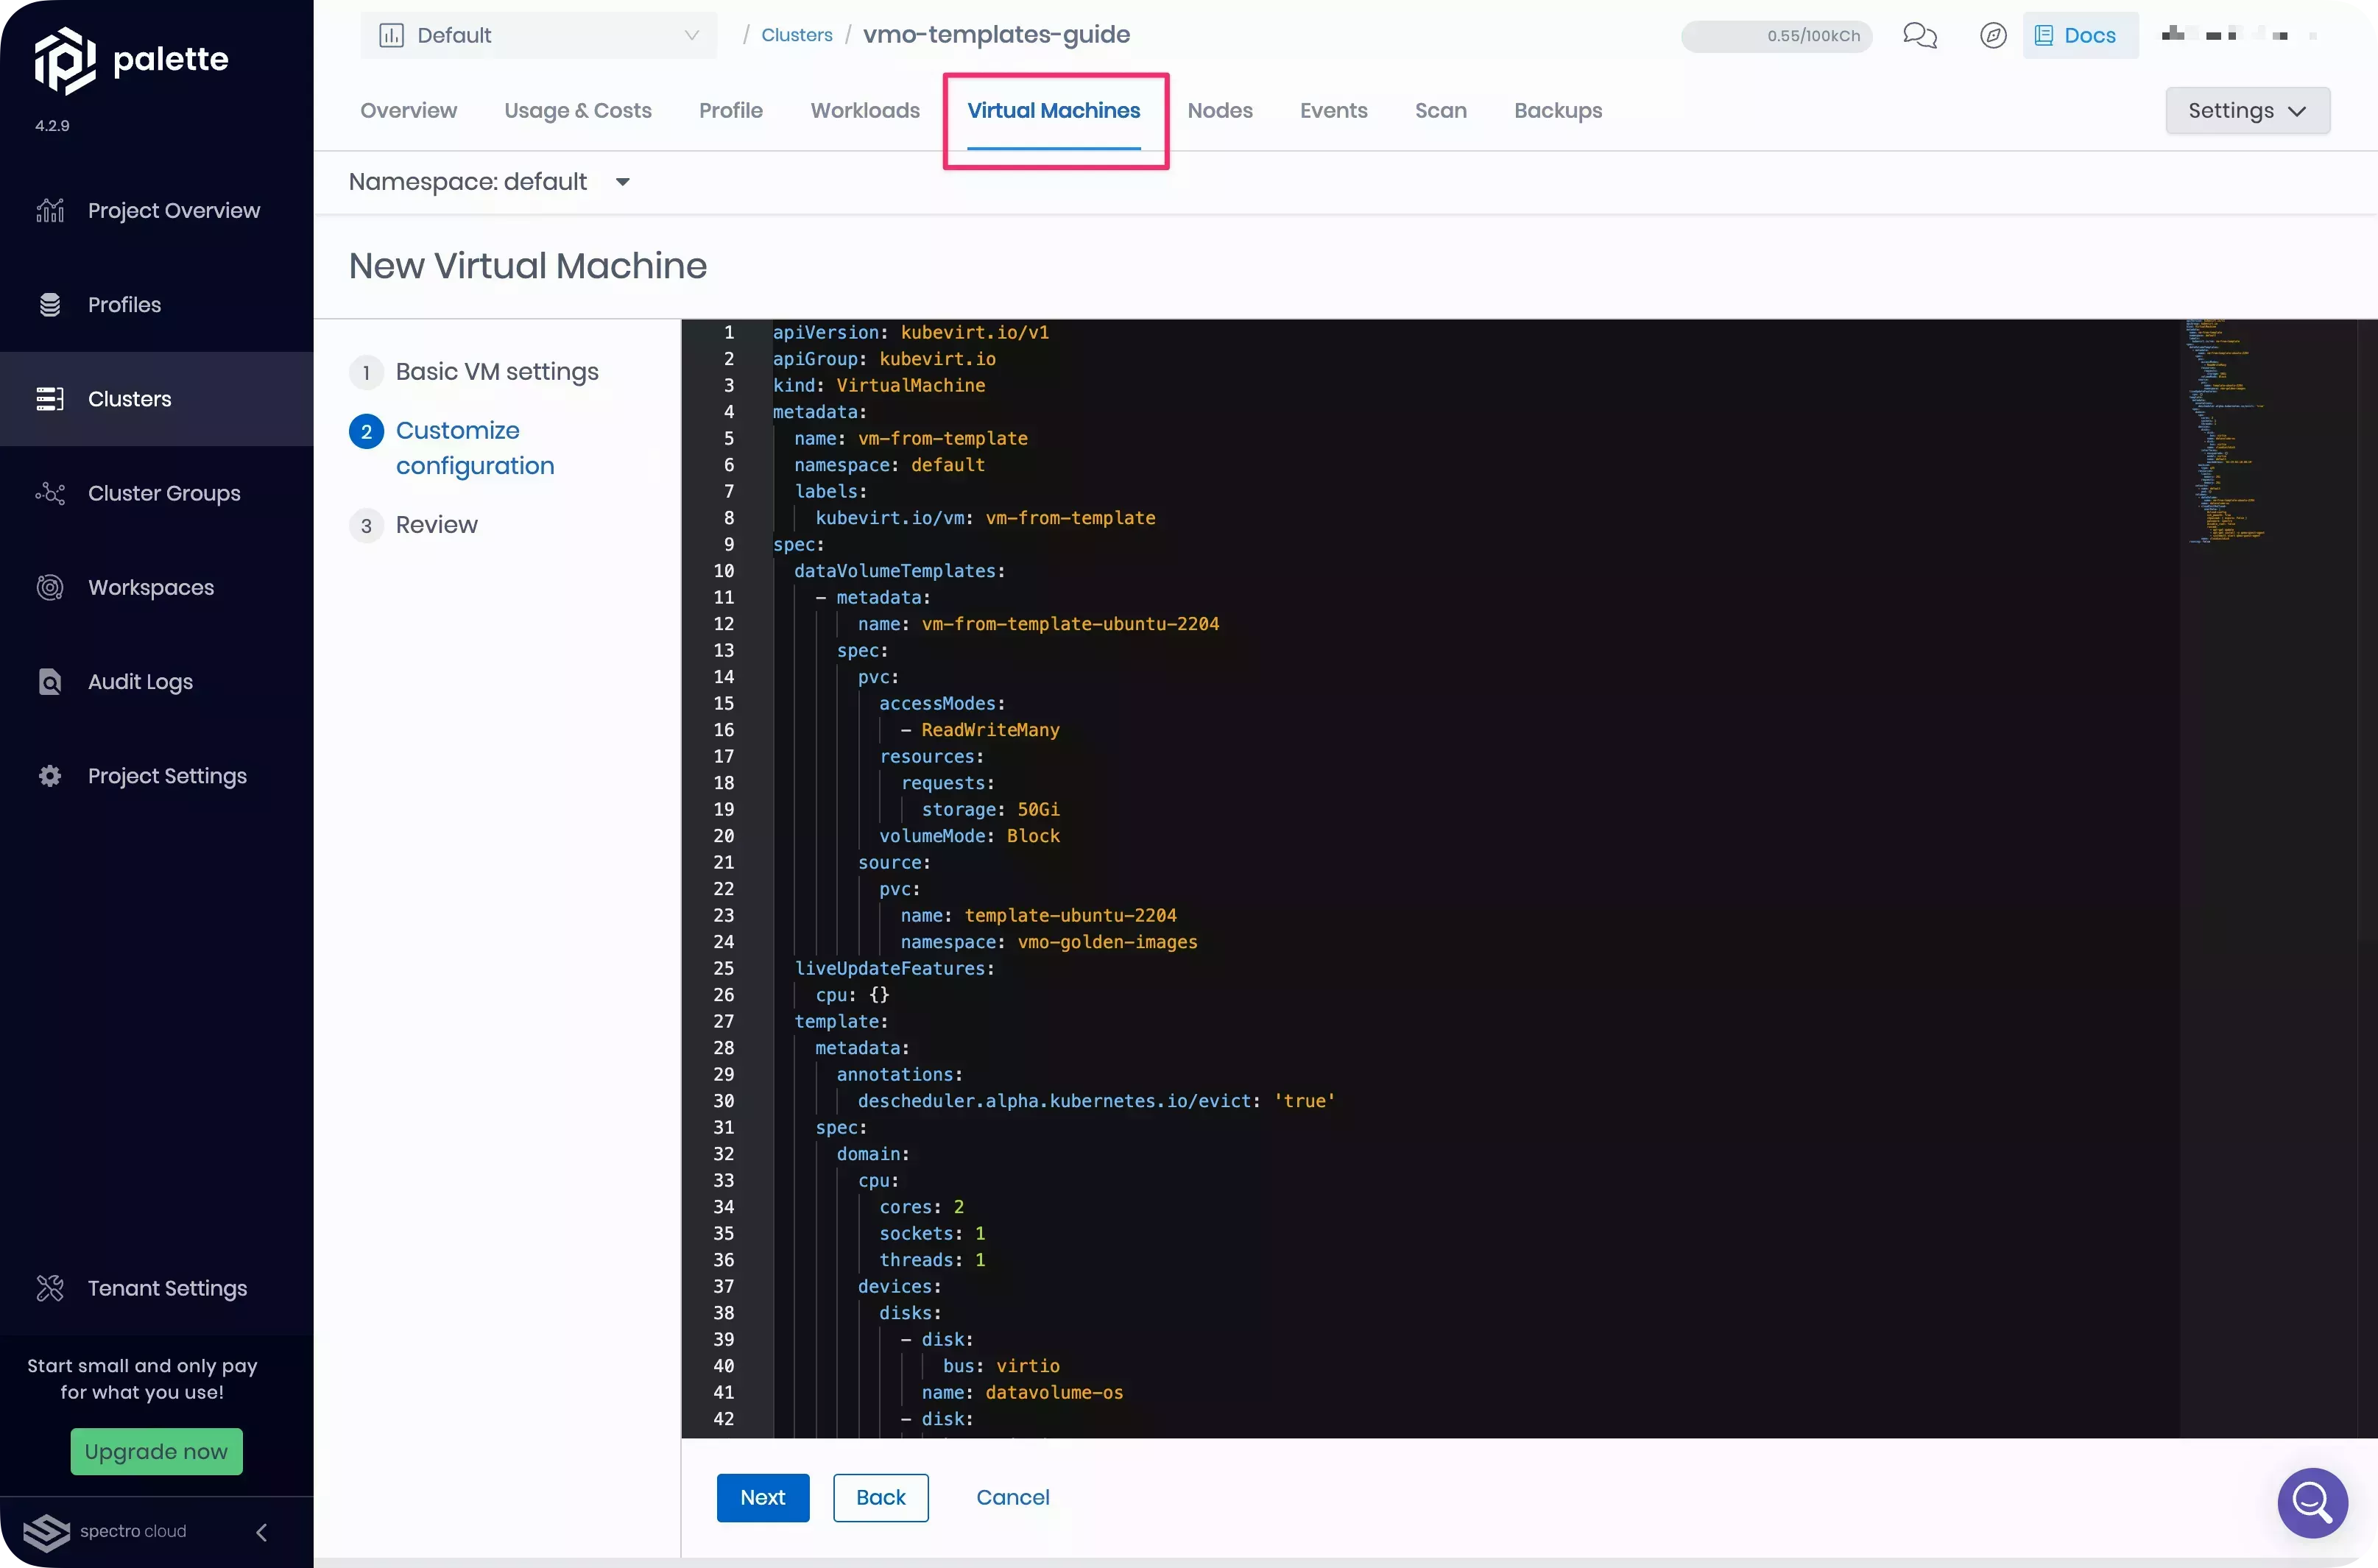
Once the cluster updates, this VM template is available to the VMs you create on your cluster. Check out the Deploy VM From a Template guide for more information.
Resources
To learn more about the Palette VMO, we encourage you to check out the reference resources below.